Examples
Controlling the Charging Process of a WARP Charger
The charging process can be controlled using the following APIs:
evse/start_chargingstarts a charging process. A charging process starts automatically unless manual charging authorization (under Wallbox -> Settings orevse/auto_start_charging) is enabled.evse/stop_chargingstops a charging process. A stopped charging process can be reactivated withevse/start_charging.evse/external_currentsets a charging current limit. For this, external control (under Wallbox -> Settings orevse/external_enabled) must be enabled.
A charging process can also be stopped or blocked for other reasons, for example because load management, NFC authorization, or OCPP are blocking. For details see TODO LINK LADESLOTS
Starting a Charging Process
- HTTP (curl)
- MQTT (mosquitto)
# $HOST e.g. warp-AbCd
curl http://$HOST/evse/start_charging -d 'null'
# $BROKER e.g. my_mosquitto.localdomain
# $PREFIX e.g. warp/AbCd
mosquitto_pub -h $BROKER -t $PREFIX/evse/start_charging -m 'null'
Stopping a Charging Process
- HTTP (curl)
- MQTT (mosquitto)
# $HOST e.g. warp-AbCd
curl http://$HOST/evse/stop_charging -d 'null'
# $BROKER e.g. my_mosquitto.localdomain
# $PREFIX e.g. warp/AbCd
mosquitto_pub -h $BROKER -t $PREFIX/evse/stop_charging -m 'null'
Reading/Writing the Charging Current Limit
A charging current limit can also be set via evse/global_current.
However, this limit is stored in the flash memory of the charge controller.
When frequently setting the charging current limit, evse/external_current should be used (to protect the flash memory of the charge controller).
- HTTP (curl)
- MQTT (mosquitto)
# $HOST e.g. warp-AbCd
Read
curl http://$HOST/evse/external_current
{ "current": 16000 }
Write
curl http://$HOST/evse/external_current -d '{ "current": 16000 }'
or shortened:
curl http://$HOST/evse/external_current -d '16000'
# $BROKER e.g. my_mosquitto.localdomain
# $PREFIX e.g. warp/AbCd
Read
mosquitto_sub -v -C 1 -h $BROKER -t $PREFIX/evse/external_current
{ "current": 16000 }
Write
With MQTT to $PREFIX/evse/external_current_update
mosquitto_pub -h $BROKER -t $PREFIX/evse/external_current_update -m '{ "current": 16000 }'
or shortened:
mosquitto_pub -h $BROKER -t $PREFIX/evse/external_current_update -m '16000'
Simulating an NFC Tag
Via the API, a WARP Charger can be made to believe that an NFC tag was detected. Both tags assigned to users and unknown tags (which can be used in an automation rule, for example) can be simulated.
The following APIs can be used to simulate a tag:
nfc/inject_tag_startSimulates an NFC tag. The tag can start a charging process if it is known and assigned to a user. If a charging process is already running, this tag is ignored.nfc/inject_tag_stopSimulates an NFC tag. The tag can stop a charging process if it is known and assigned to a user. If no charging process is running, this tag is ignored.nfc/inject_tagSimulates an NFC tag that can both start and stop a charging process if it is known and assigned to a user.
All three APIs must be passed the type and ID of the tag.
- HTTP (curl)
- MQTT (mosquitto)
# $HOST e.g. warp-AbCd
curl http://$HOST/nfc/inject_tag -d '{ "tag_type": 0, "tag_id": "01:23:AB:3D" }'
# $BROKER e.g. my_mosquitto.localdomain
# $PREFIX e.g. warp/AbCd
mosquitto_pub -h $BROKER -t $PREFIX/nfc/inject_tag -m '{ "tag_type": 0, "tag_id": "01:23:AB:3D" }'
API Meter for PV Excess
For an energy meter to be used for PV excess charging, it must measure the active power at the grid connection. So that the controller can react quickly to available PV excess, the measured values should be updated approximately every second.
Creating the API Meter
An API meter can be configured as follows:
- Create a new energy meter on the energy meter subpage
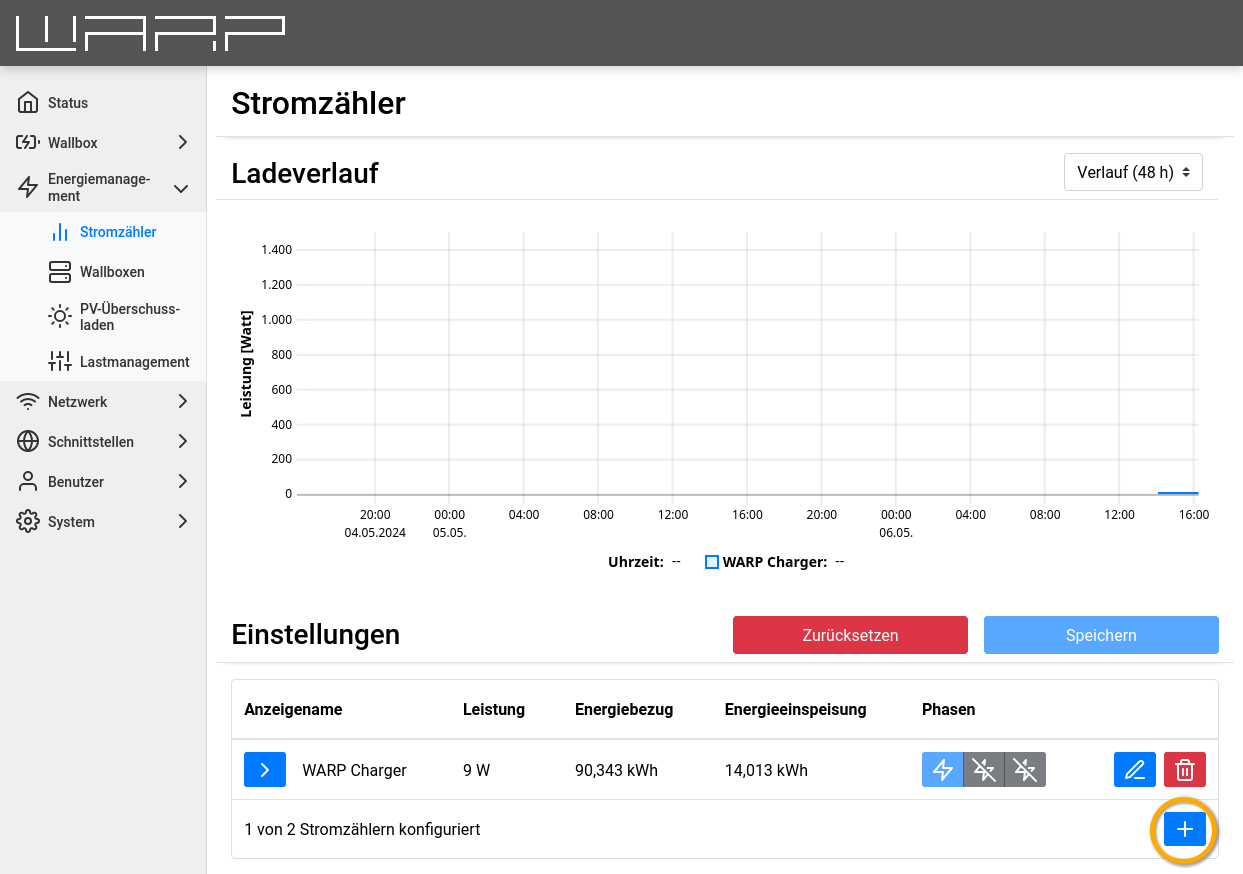
- Enter energy meter class
APIand display name, then add value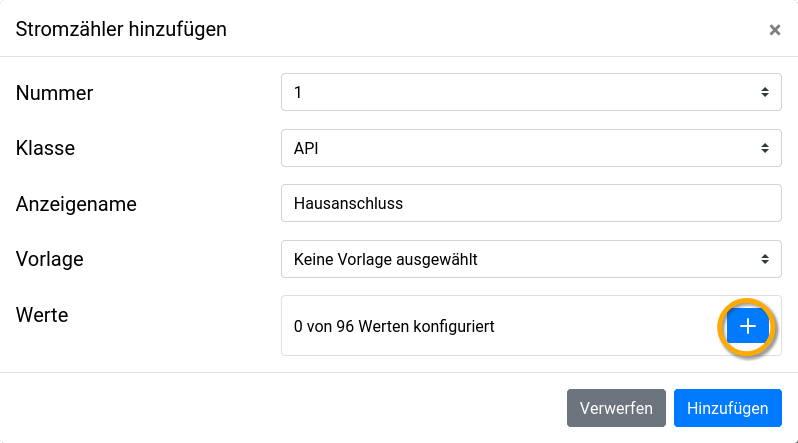
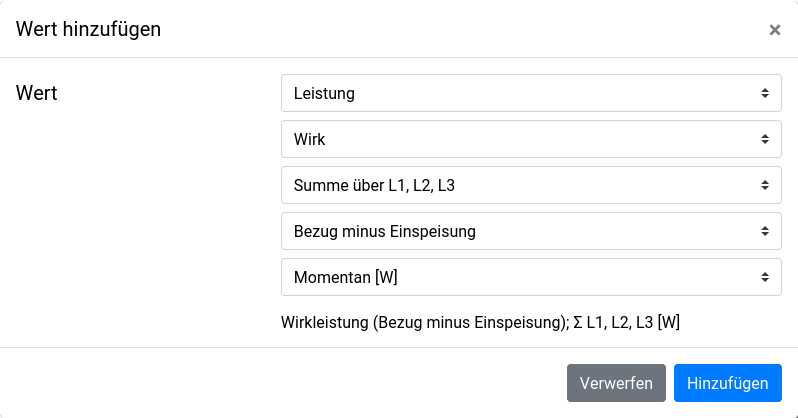
- Select the active power (sum of all phases) consumption minus feed-in as value
Alternatively, the API meter can be configured via API:
- HTTP (curl)
- MQTT (mosquitto)
# $HOST e.g. warp-AbCd
curl http://$HOST/meters/1/config -d '[4,{"display_name":"Grid connection","value_ids":[74]}]'
# $BROKER e.g. my_mosquitto.localdomain
# $PREFIX e.g. warp/AbCd
mosquitto_pub -h $BROKER -t $PREFIX/meters/1/config -m '[4,{"display_name":"Grid connection","value_ids":[74]}]'
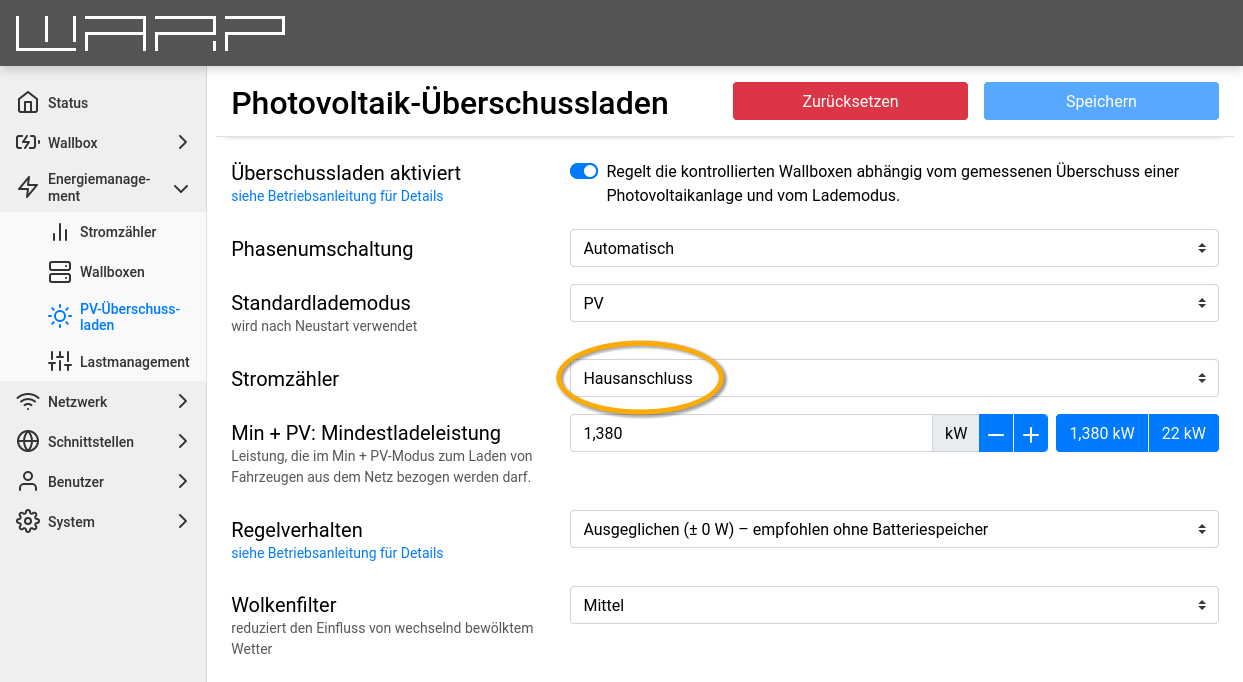
Configuration of PV Excess Charging
For the new API meter to be used for PV excess charging, it must be selected in its settings:
Writing Measured Values via API
The PV excess at the grid connection can now be reported via the API. Positive values represent consumption, i.e., the house is drawing power from the grid. Negative values represent feed-in to the power grid. If there is a PV excess of 2030.5 watts, it can be reported as follows:
- HTTP (curl)
- MQTT (mosquitto)
# $HOST e.g. warp-AbCd
curl http://$HOST/meters/1/update -d '[-2030.5]'
# $BROKER e.g. my_mosquitto.localdomain
# $PREFIX e.g. warp/AbCd
mosquitto_pub -h $BROKER -t $PREFIX/meters/1/update -m '[-2030.5]'