EVCC
Introduction
Your WARP Charger is compatible with EVCC. EVCC is an open-source solution that allows you to easily use the excess power from your photovoltaic system to charge your electric car. EVCC also implements additional APIs that allow you, for example, to prioritize a home battery or charge your electric car to a desired state of charge. More information about EVCC can be found at evcc.io, detailed documentation, a support forum, and the source code in the GitHub repository.

Some functions of EVCC can also be run by the WARP Charger or WARP Energy Manager itself. On the other hand EVCC supports a greater array of devices, for example chargers of other manufactureres and can read information of plugged in vehicles via cloud APIs. Some features of EVCC (not the integration of WARP products!) require buying an EVCC sponsor token.
This guide shows you how to set up EVCC and link your WARP Charger with EVCC. For this you only need your WARP Charger and a computer on which EVCC should run. In the following, we use a Raspberry Pi. EVCC can also be installed on other platforms, but since the control of the WARP Charger should be as robust as possible, it makes sense to dedicate a system solely for this purpose.
Preparing the Raspberry Pi
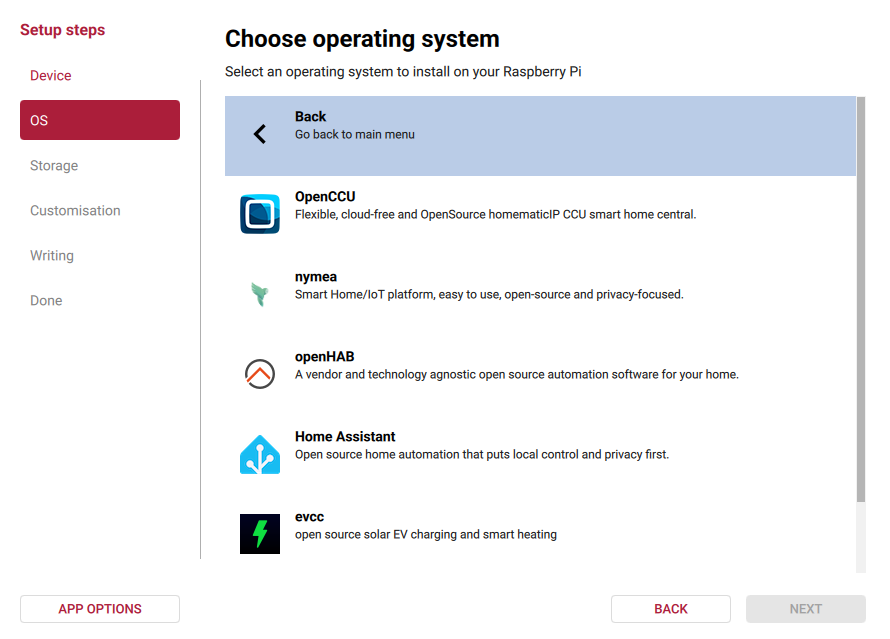
First, you need to prepare an SD card with the operating system for the Raspberry Pi. The easiest way is with the Raspberry Pi Imager, but you can also follow the official setup-guide of EVCC. The RPi Imager downloads the selected operating system and flashes it onto a connected micro SD card. When selecting an operating system, you can select the up-to-date version of EVCC in "Other specific-purpose OS" -> "Home automation" -> "EVCC".
After writing the SD card, you can insert the micro SD card into the Raspberry Pi and boot it. EVCC's webinterface should be reachable after one to two minutes under https://evcc.local .
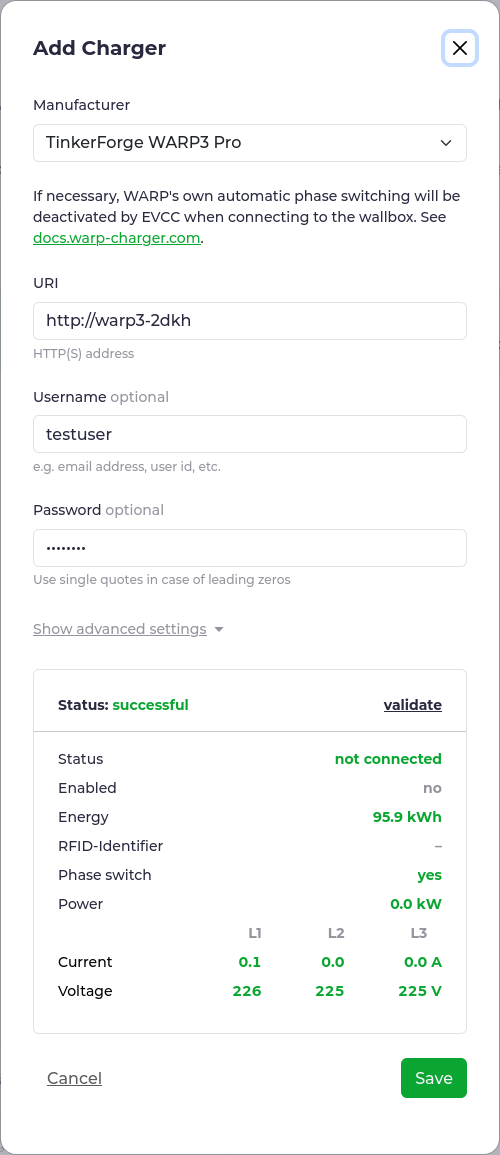
After setting an administrator password, you can start the configuration process. Click "Add charger or heater" -> "Add charging point" and set a title, for example "WARP Charger". Then select your type of WARP Charger in the list of supported chargers. Then you have to set the address under which the charger's web interface is reachable and (if configured) the username and password. If you want to control a WARP2 Charger with a WARP Energy Manager used to switch phases, you can select this setup here and have to also configure the energy manager's address and possibly credentials.
After clicking "validate" the charger's status is shown and you can save the configuration
After this, some EVCC specific charge settings must be configured to finish the setup process. To be able to control the WARP Charger, EVCC must then be restarted by clicking the button at the bottom of the page. Before that you can configure more of EVCC's Devices, Integrations and Features