First Steps
The initial setup for WARP Charger and WARP Energy Manager is essentially identical. Both devices can be integrated into a network via WiFi or LAN.
To configure the device (WARP Charger or WARP Energy Manager), a connection to the device must first be established so that it can be configured via the web interface using a web browser.
Step 1: Establish Connection to WARP Charger / WARP Energy Manager
Option 1: WiFi
Since the WARP Energy Manager is typically installed in a distribution cabinet, we recommend using LAN for it.
In factory state, the device opens a WiFi access point. The device can be configured via this by accessing the device's web interface. The WiFi name (SSID) and password is individual for each device. The SSID has the structure warp3-ABCD or wem2-ABCD.
The access point credentials can be found on the WiFi credentials sticker on the back of the operating manual. Either the QR code on the sticker, which automatically configures the WiFi, or the SSID and passphrase can be used. Most smartphone camera apps support reading the QR code and automatically connecting to the WiFi. Many smartphones detect that internet access is not possible via the device's access point. Therefore, the mobile data connection (e.g. LTE) may need to be deactivated, or a prompt asking whether to disconnect from the device's access point should be declined.
When connected to the device's access point, the web interface can be accessed at http://10.0.0.1 via any browser. Alternatively, the following QR code can be scanned.

If the WiFi access point credentials are no longer known and the operating manual cannot be found, the factory-set credentials can be found as follows:
WARP Charger: Inside the charger, the credentials sticker is attached to one of the contactors.
WARP Energy Manager: The credentials sticker is on the underside of the circuit board. To see it, the housing bottom must be removed.
Option 2: LAN
When a LAN cable is plugged in, the WARP Charger / WARP Energy Manager automatically connects to a wired network (IP address obtained via DHCP). The device can then be reached either via the assigned IP address http://[device-IP], e.g. http://192.168.0.42 or via the device's hostname http://[hostname], e.g. http://warp3-ABC or http://wem2-ABC.
The device's hostname is identical to the SSID of the WiFi access point. The hostname can be found on the WiFi credentials sticker on the back of this manual.
If the IP assigned to the charger/energy manager via DHCP cannot be determined, the previously mentioned access to the web interface via the WiFi access point can be used to determine the IP address of the LAN interface.
Step 2: Integration into Your Own Network
The WARP Charger / WARP Energy Manager can be integrated into a network via WiFi or LAN. All configuration options can be found in the Network menu:
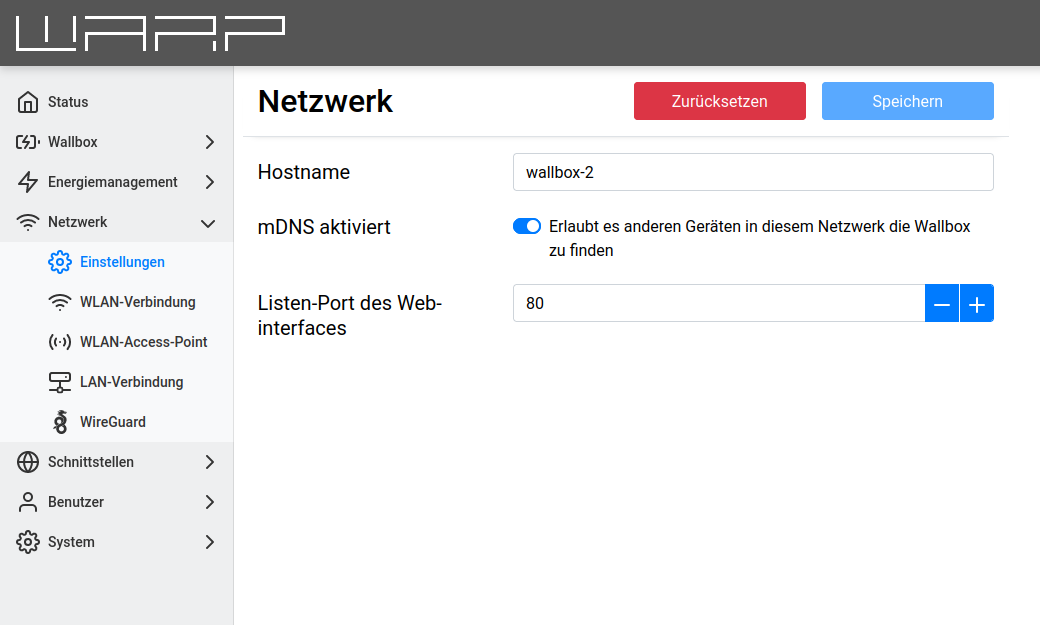
Under Settings, the hostname of the WARP Charger / WARP Energy Manager can be configured for all connected networks. Additionally, mDNS can be enabled or disabled. Via mDNS, other devices on the network can find the device. This simplifies, for example, the setup of a charge management cluster. Additionally, the port on which the web interface is accessible can be changed (default is port 80).
Further information is available in the web interface documentation: Settings
WiFi Connection
One option for integrating the WARP Charger / WARP Energy Manager into a network is via WiFi. By pressing the "Network Search" button, a menu opens where the desired WiFi network can be selected.
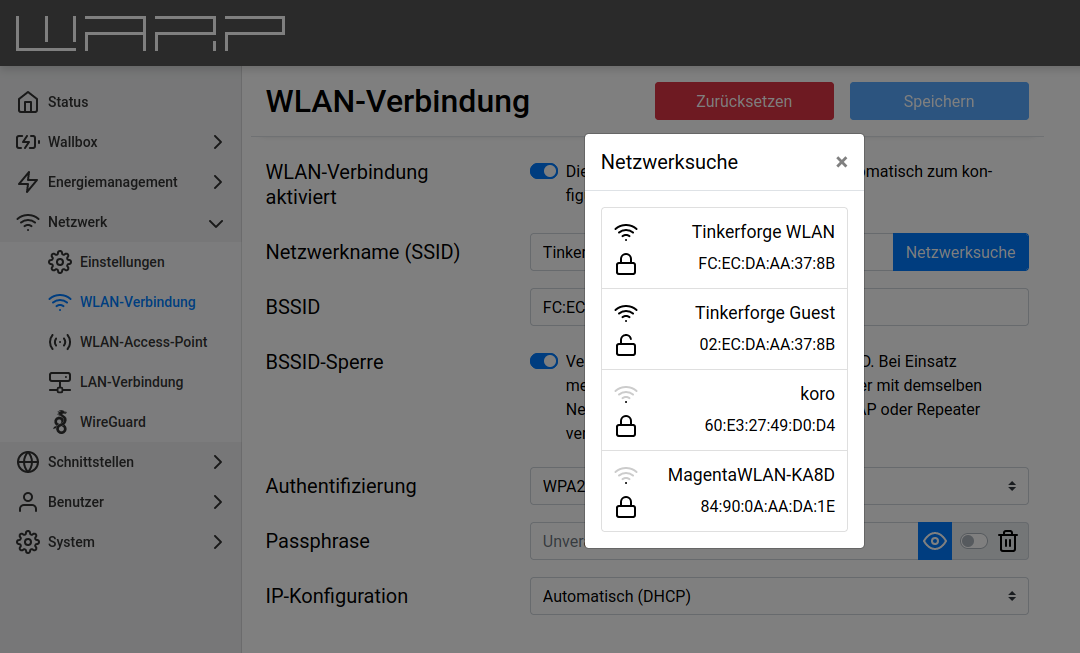
The network name (SSID) and BSSID are then automatically entered, and the connection is activated on restart. If necessary, the passphrase for the selected network must now be entered.
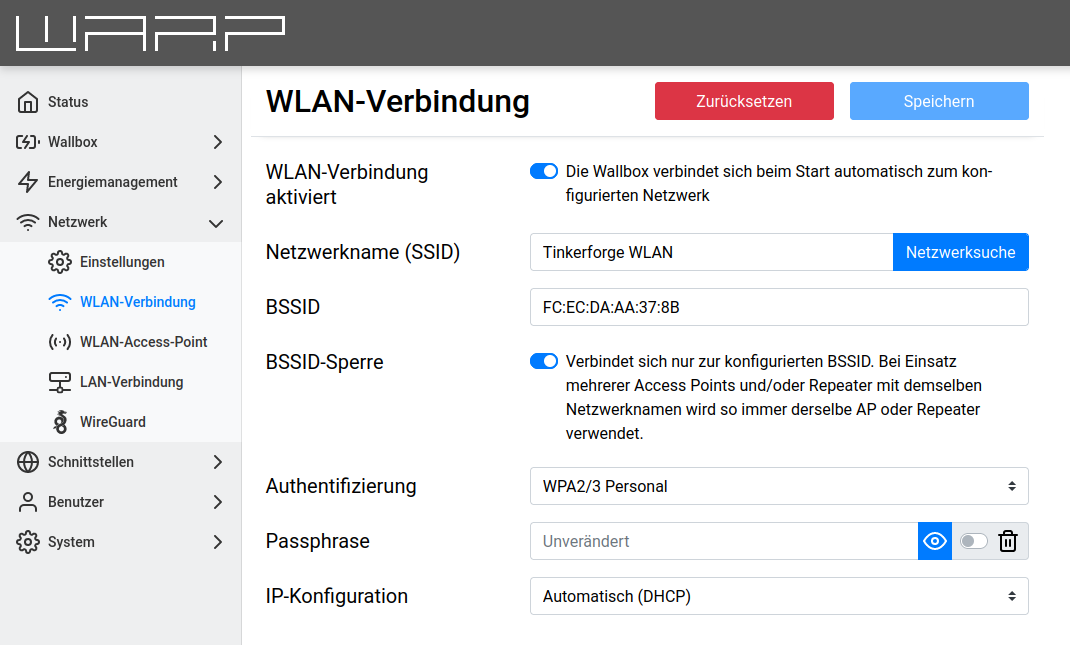
The configuration can now be saved with the Save button. The web interface will then restart and connect to the configured WiFi. The status page shows whether the connection was successful. The access point remains open so that configuration errors can be corrected. Since the access point uses the same channel as a possibly connected network, it may be necessary to reconnect to the access point.
With a successful connection, the device should now be reachable in the configured network at http://[configured_hostname], e.g. http://warp3-ABC or http://wem2-ABC.
Further information is available in the web interface documentation: WiFi Connection
WiFi Access Point
The access point can be operated in one of two modes: Either it can always be active or only when the connection to another WiFi or LAN is not configured or has failed. Additionally, the access point can be completely disabled.
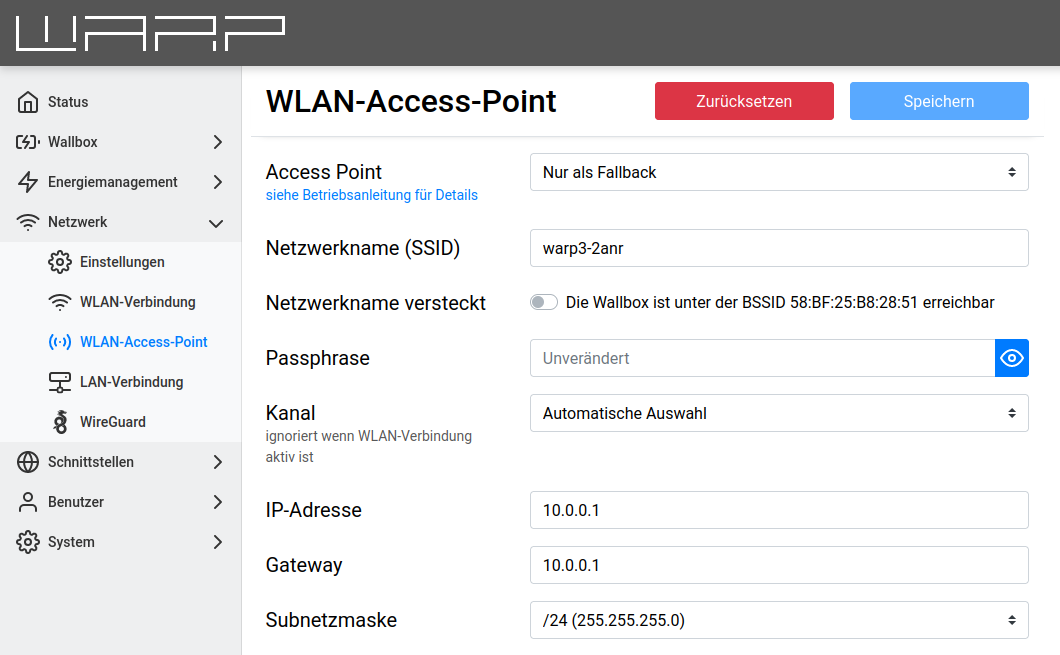
We recommend never completely disabling the access point, as otherwise if the connection to another network fails, the web interface can no longer be reached. The energy manager can then only be reached via recovery mode or a factory reset.
The access point mode, network name, passphrase, etc. can be configured here.
Further information is available in the web interface documentation: WiFi Access Point
LAN Connection
As an alternative to WiFi connection, the WARP Charger / WARP Energy Manager can also be integrated into the network via wired LAN. In most cases, a LAN connection is established automatically if a cable is plugged in (IP address is obtained via DHCP). However, it is also possible to enter a static IP configuration, or, if desired, to completely disable the LAN connection.
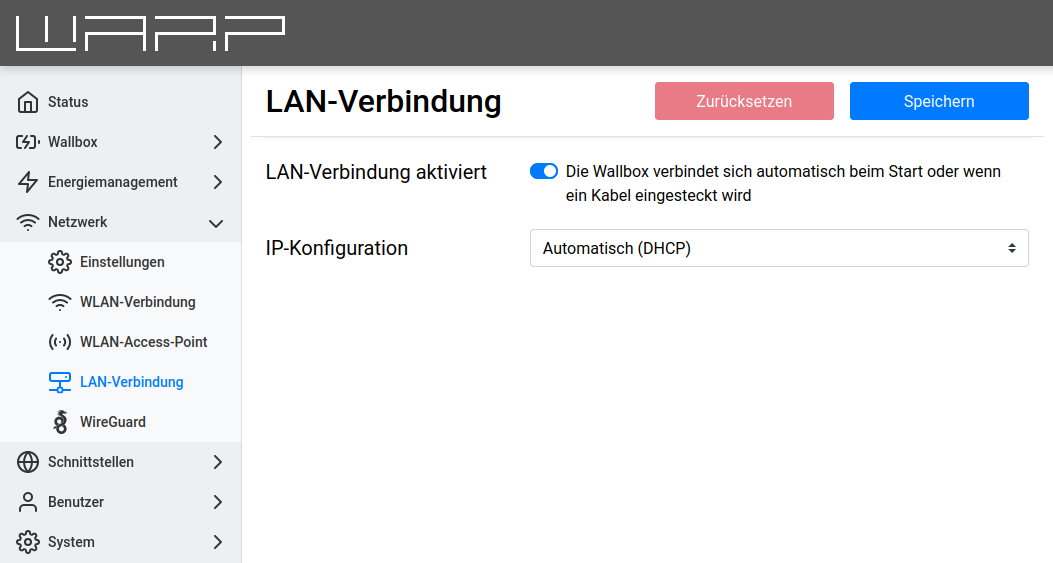
With a successful connection, the device should now be reachable on the LAN at http://[configured_hostname], e.g. http://warp3-ABC or http://wem2-ABC.
The LAN and WiFi connections should not be connected simultaneously to the same network or IP range, as this can lead to connection problems.
Further information is available in the web interface documentation: LAN Connection
Step 3: Firmware Update
Generally, we recommend performing a firmware update after installation to get the latest features and any bug fixes. If the network has internet access, you can simply search for new firmware with the press of a button and install it.
If internet access via the network is not possible, the firmware can also be downloaded externally and installed manually.
Further information is available in the web interface documentation: Firmware Update
Step 4: Configuration
Now that the WARP Charger or WARP Energy Manager has been integrated into a network and has the latest firmware, configuration can begin.
The configuration depends on the individual circumstances. A WARP Charger is configured from the factory so that charging processes begin directly after connecting a vehicle. NFC user authorization, charge management, setting up other devices (energy meters), or PV excess charging can now be configured.