SoC and Autocharge
This tutorial shows step by step how to set up the SoC display (the vehicle's state of charge) and Autocharge.
- SoC display: The charger reads out the vehicle's state of charge (SoC) and keeps estimating it during charging.
- Autocharge: Automatic charge authorization via vehicle identification. The charger recognizes the vehicle by its MAC address and authorizes charging automatically, without the need for an NFC tag.
Both functions use the ISO 15118 communication between vehicle and charger and are therefore only available on the WARP4 Charger. A prerequisite is a vehicle that supports ISO 15118 communication.
How this communication works in detail, which standards exist for it, and what the WARP charger currently supports is explained in the article ISO 15118 Details.
The basic procedure is:
- Enable SoC reading and/or Autocharge.
- Connect the vehicle so that it is detected by the charger.
- Create the detected vehicle as a vehicle profile.
- Assign the vehicle to a user (for Autocharge with charge authorization and charge log).
Step 1: Enable SoC reading and/or Autocharge
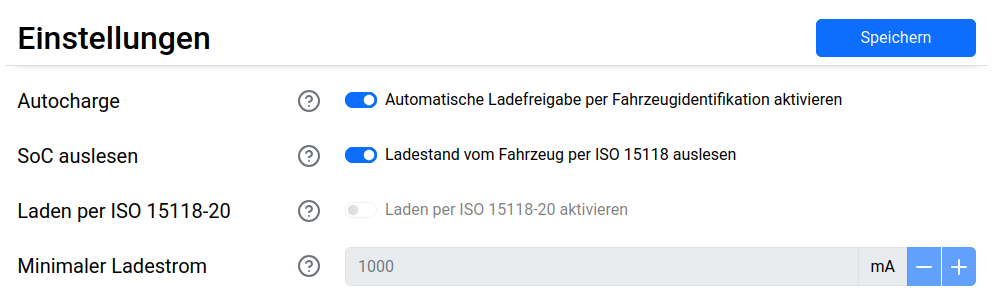
In the web interface, the ISO 15118 functions are enabled under Charger -> ISO 15118:
- Enable Autocharge to use automatic charge authorization via vehicle identification.
- Enable Read SoC to display the vehicle's state of charge. This function requires the built-in energy meter of the WARP4 Charger Pro.
Further information on this can be found in the web interface documentation: ISO 15118.
Step 2: Connect the vehicle
Now connect the vehicle to the charger. When connecting, the charger briefly communicates with the vehicle to read out its unique network identifier (MAC address). Depending on the vehicle, this process takes about 5 to 20 seconds.
If the state of charge is read out as well, this can take about 10 to 45 seconds, depending on the vehicle.
For the vehicle to be detected, it must have been connected to the charger at least once after Autocharge or SoC reading was enabled.
Step 3: Create the detected vehicle as a profile
Now switch to Users -> Vehicles in the web interface and click the + button to create
a new vehicle profile.
In the window that opens, the vehicle MAC addresses recently detected by the charger are listed under Recently seen MACs. The vehicle connected in step 2 should appear here. Clicking the + button next to the address copies it directly into the MAC address field.
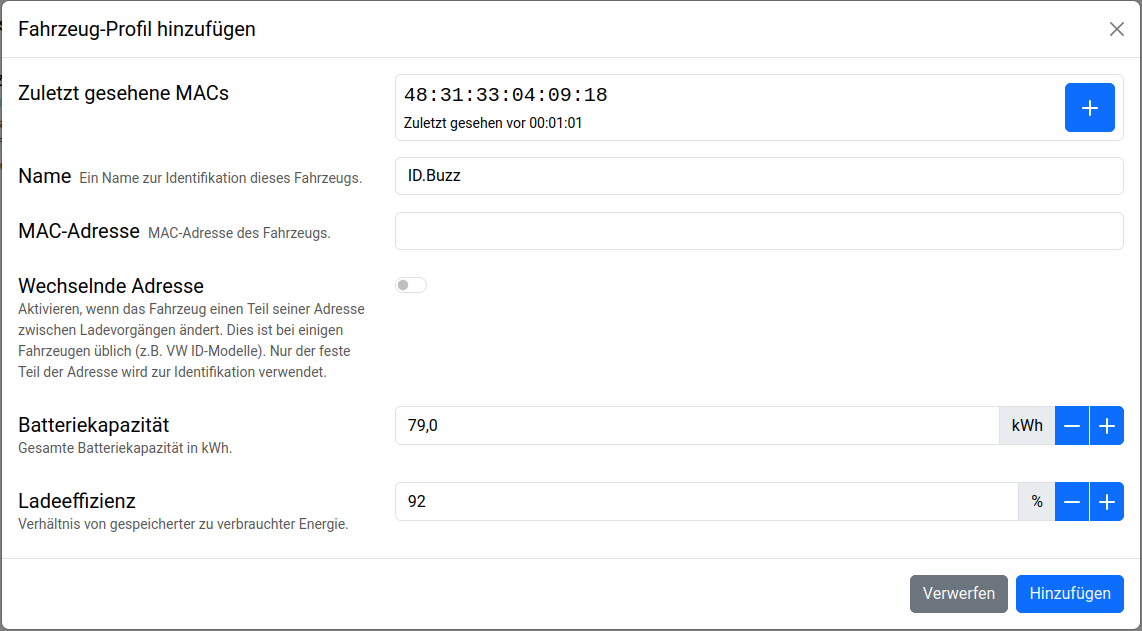
Then enter the remaining details:
- Name: A freely selectable name to identify the vehicle.
- Changing address: Enable this option if the vehicle changes part of its MAC address between charging sessions (e.g. for VW ID models). In that case, only the fixed front part of the address is used for identification.
- Battery capacity and charging efficiency: These values are used to estimate the state of charge. The default values (60 kWh, 92 %) can be adjusted to the vehicle if needed.
Save the profile and restart the charger.
Further information on this can be found in the web interface documentation: Vehicles.
For the SoC display alone, the setup is now complete. As soon as the vehicle is connected, its name and state of charge are shown on the Vehicles page, at the energy meters, and on the status page. For Autocharge, step 4 still follows.
Step 4: Assign the vehicle to a user
So that charging sessions authorized via Autocharge are assigned to a user and the user's individual charging current limit can be applied, the vehicle is assigned to a user.
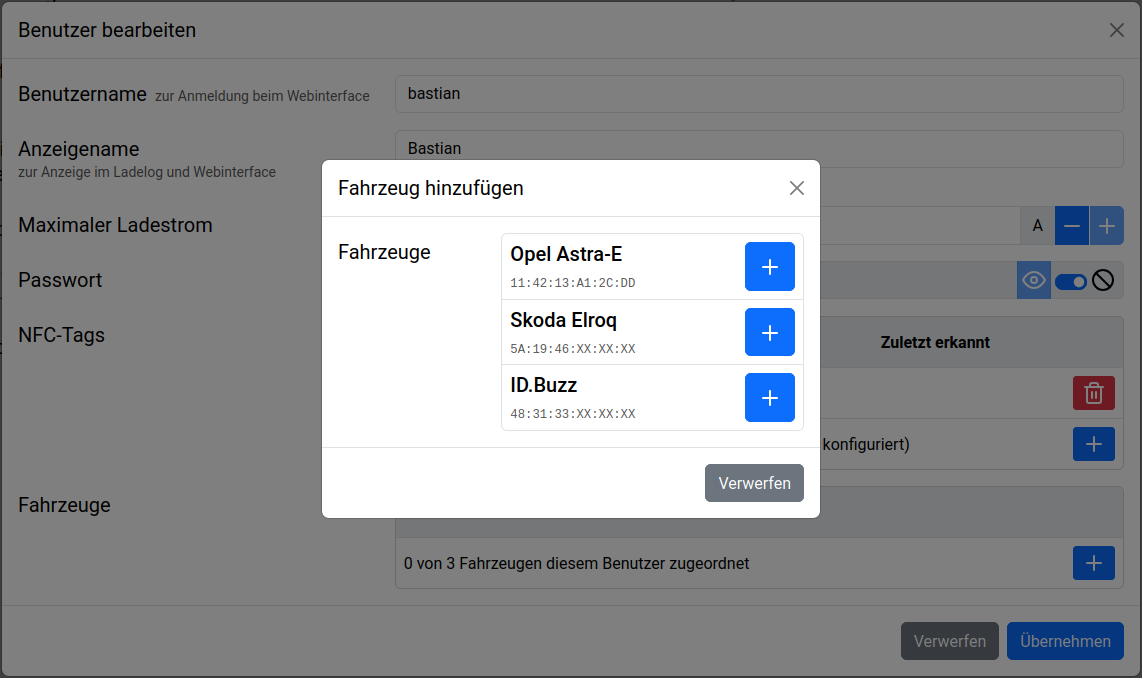
To do so, switch to Users -> User Management and create a new user or edit an existing
one. In the Vehicles section, the previously created vehicle profile can be selected
via the + button and assigned to the user.
So that charging sessions are actually only authorized for permitted vehicles, the charge authorization must additionally be enabled in the user management, analogous to authorization via NFC tag. If charge authorization is not enabled, every vehicle charges. The assigned vehicle is then only used for attribution in the charge log.
If the central management of a charge manager is used, charge authorization is active automatically: charging sessions at the managed chargers are then only authorized after authentication anyway. In that case, the (local) charge authorization does not need to be enabled additionally. See Chargers.
Further information on this can be found in the web interface documentation: User Management.
Result
After the setup, the charger automatically recognizes the vehicle when it is connected:
- The charging session is authorized via Autocharge (with charge authorization enabled, only for known, assigned vehicles) and attributed to the assigned user in the charge log.
- The vehicle's state of charge is read out, estimated, and displayed.